
Tired of buying chews that your dog shreds in five minutes?
You can make long-lasting chews at home that actually hold up, like dehydrated sweet potato chips, gelatin-bound protein bites, and pressed milk-curd yak-style blocks.
This post gives simple recipes and drying tricks to make chews tougher, safer, and cheaper, so your pup gets hours of healthy chewing instead of crumbs in your treat pouch.
Follow the step-by-step methods below and you’ll learn how to adjust slice thickness, bake times, and ingredients for your dog’s jaw strength and tummy needs.
Core DIY Recipes for Making Long-Lasting Chews at Home

Aggressive chewers need homemade options that actually hold up. You don’t want to keep buying the same thing every three days. Three recipe types work best: vegetable-based slow-baked chips, gelatin-firmed protein bites, and milk-curd hard chews. Each one resists heavy jaws differently. Vegetable options rely on low moisture and high fiber. Gelatin recipes use binding proteins to create that chewy-firm structure. Milk-based chews copy traditional yak cheese and end up being the hardest, longest-lasting option you can make.
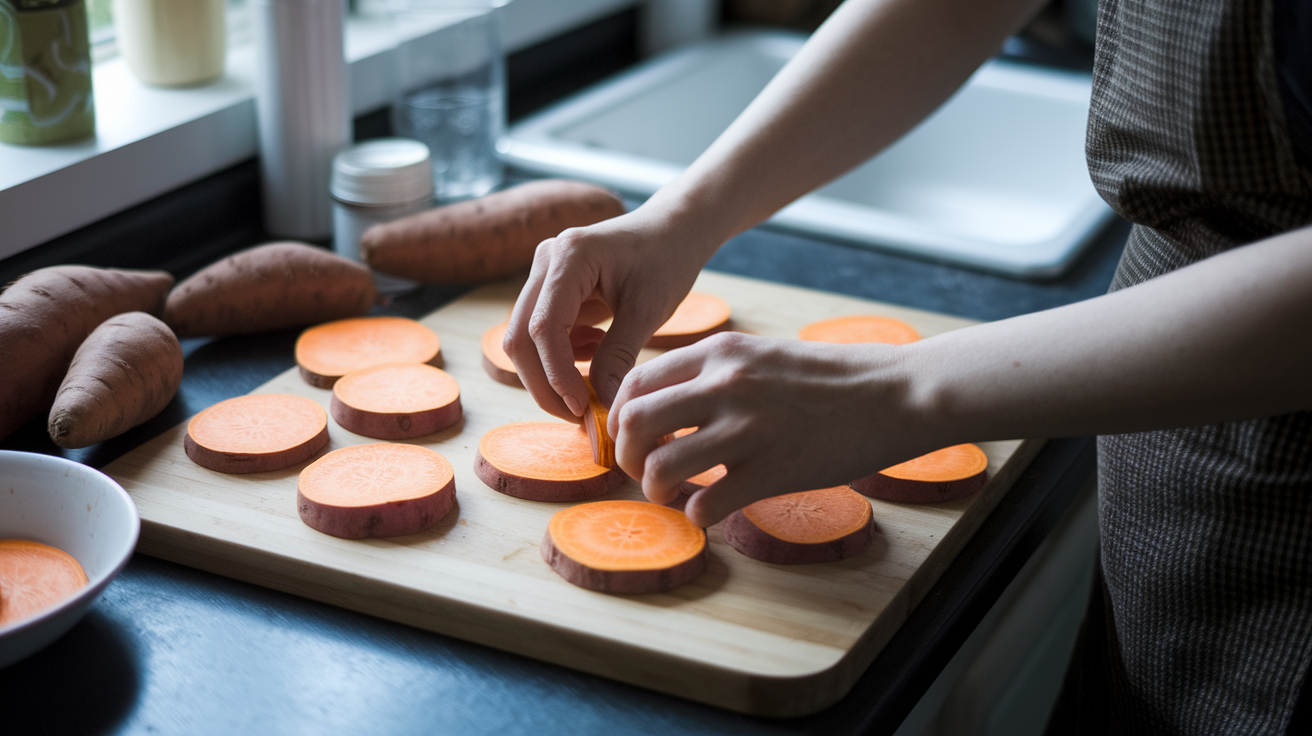
Sweet potato hard-bake chips are straightforward. Slice raw sweet potatoes into 1/4-inch rounds, arrange them on a parchment-lined baking sheet without overlapping, and bake at 250°F for 2.5 to 3 hours until they’re completely dry and firm. Flip them halfway through. Thicker slices take longer but produce tougher chews. A 3-pound sweet potato gets you around 12 to 15 chews, depending on how wide they are. These last anywhere from 20 minutes to an hour with heavy chewers. Longer if you cut them thicker or bake them drier.
Gelatin or pumpkin mixtures add binding strength. Mix 1 cup unsweetened pumpkin purée with 2 tablespoons plain gelatin powder and 1/4 cup water. Heat gently until the gelatin dissolves, pour into silicone molds, and refrigerate for 4 hours. Once they’re set, transfer to a dehydrator at 160°F for 6 to 8 hours, or bake at the lowest oven setting until the pieces feel leathery and firm. The gelatin creates a chewy texture that doesn’t crumble when your dog gnaws. Expect these to last 30 to 45 minutes with strong chewers.
Yak-style chews use milk curds pressed and baked into rock-hard blocks. You’re basically curdling skim milk with citrus acid, pressing the curds under weight for hours, then baking and air-drying to pull out all the moisture. These homemade versions can last for weeks if you store them right, and they provide hours of chewing per piece. Full instructions show up later in this article.
For any recipe, the longer you bake or dehydrate, the harder and longer-lasting the chew becomes. Start with moderate times and push upward if your dog finishes too quickly.
Edible Ingredient Options for Tough Homemade Chews

The safest and most durable homemade chews start with whole, single-ingredient foods. Carrots, sweet potatoes, and unsweetened pumpkin purée offer natural fiber and low moisture. Both of those support firmness when dried. Peanut butter works as a flavor coating or binder, but you’ve got to check the label for xylitol. That sweetener is toxic to dogs. Use only creamy, unsalted, xylitol-free varieties. Low-sodium broth adds scent and flavor to frozen cloth chews or gelatin recipes without the salt overload that stresses kidneys.
Dogs with sensitive stomachs do well with hypoallergenic ingredients like sweet potato and carrot. Both are grain-free, single-source options that rarely trigger reactions. Pumpkin purée supports digestion thanks to soluble fiber, and it binds well with gelatin or coconut oil to create moldable, firm chews. Fat content matters. Recipes with added fats (like a small amount of olive oil) stay softer and more pliable. Recipes that skip fat and rely only on fiber and protein dry harder and last longer.
Ingredient hardness potential varies by type and preparation:
Sweet potato (dehydrated): high fiber, very low moisture when fully dried. Produces hard, brittle chews.
Carrot (whole or thick-cut): naturally firm. Freezing adds temporary hardness for teething relief.
Pumpkin purée (gelatin-bound and dried): moderate toughness. Chewy rather than brittle.
Skim milk curds (pressed and baked): extremely hard. Mimics commercial yak chews.
Peanut butter (coating only): adds flavor but no structure. Use sparingly to avoid excess calories.
Low-sodium broth (frozen into ice): soft and temporary. Best for teething puppies, not aggressive chewers.
Choose ingredients based on your dog’s chewing style. Hard, brittle options suit dogs who gnaw methodically. Chewy, pliable recipes work better for dogs who prefer to work a chew for a long time without splintering it.
Techniques to Increase Durability in Homemade Chew Recipes
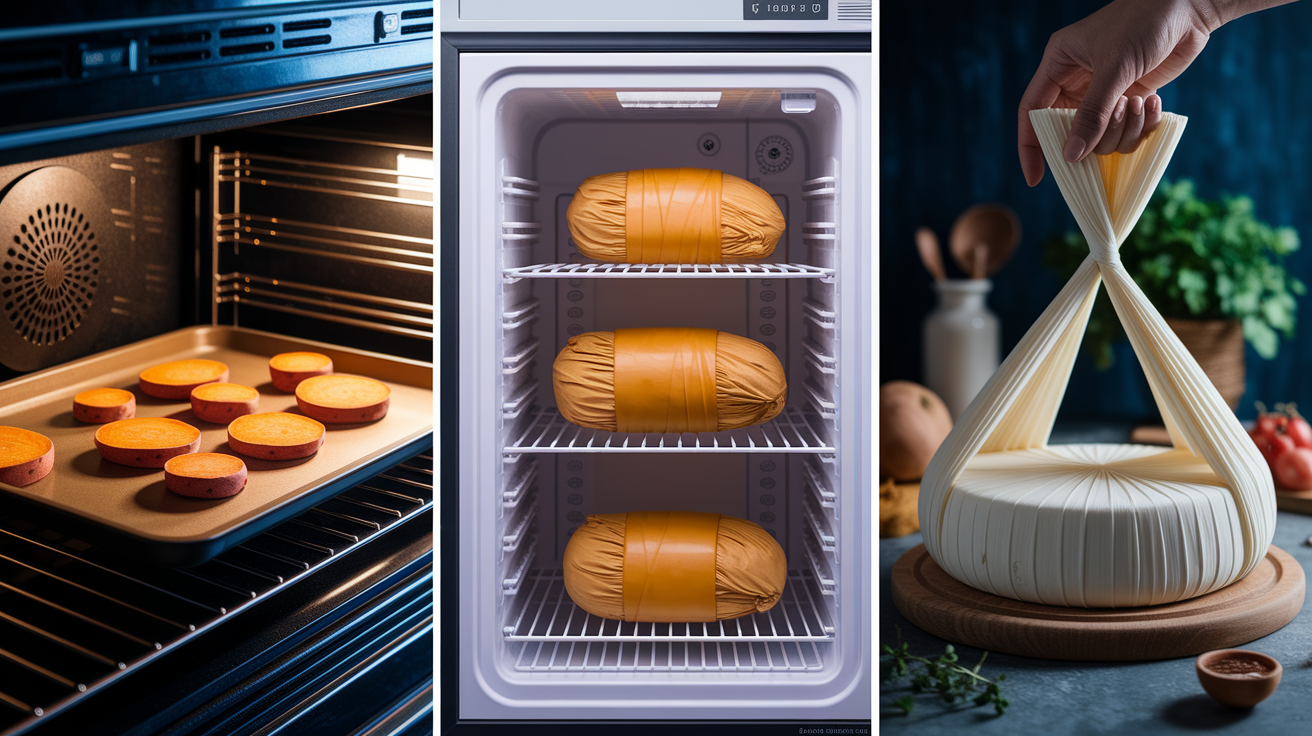
Heat-based methods remove moisture and concentrate fibers, creating harder textures that resist teeth. Oven-baking at low temperatures (200°F to 250°F) for extended periods pulls water out of vegetables and proteins without burning. Dehydrators do the same job more evenly by circulating warm air around all sides. For maximum toughness, slice ingredients thicker and bake or dehydrate longer. A 1/4-inch sweet potato slice baked for 2.5 hours produces a moderately firm chew. The same slice baked for 3.5 hours becomes brittle and rock-hard.
Freeze-based techniques add temporary firmness but don’t create lasting durability on their own. Freezing a broth-soaked towel gives teething puppies cold relief and a textured surface to gnaw, but the chew softens as it thaws. Frozen carrot sticks stay hard for 10 to 15 minutes, then they’re just carrots again. Freeze methods work best as short-term distractions or comfort tools, not as long-lasting chews for powerful jaws.
Pressure-based techniques apply to milk-curd recipes. After curdling skim milk with citrus juice, you press the curds under heavy weight for 4 to 6 hours. More pressure squeezes out more whey, leaving behind denser, harder curds. Once pressed, you bake the curds at very low heat (around 150°F) and then air-dry for 24 to 36 hours. This multi-step drying removes nearly all moisture, producing a chew that can last for days or even weeks. The longer the air-dry period, the harder the final result.
| Method | Toughness Effects |
|---|---|
| Oven-bake 250°F for 2–3 hours | Moderate to hard; good for most chewers |
| Dehydrator 160°F for 6–8 hours | Hard and leathery; minimal crumbling |
| Press + bake + air-dry (yak-style) | Extremely hard; lasts days to weeks |
Adjust time and temperature based on your dog’s chewing power. Start with recommended ranges and extend drying time if chews disappear too fast.
Non-Edible DIY Tough Chews and When They’re Appropriate

Braided fabric and rope chews offer durability when edible options get expensive or vanish in minutes. Old towels, jeans, and thick cotton socks can be cut into strips, braided tightly, and knotted at both ends. The tighter the braid, the longer the chew lasts. A 4-foot length of braided rope from a farm supply store works the same way and costs less than most store-bought toys. You can tie the rope to a trolley or pulley system strung between two solid anchors, letting your dog pull and tug without dragging the chew across the yard. Some owners rub creamy peanut butter into the rope fibers to add flavor and extend engagement.
Frozen cloth chews help teething puppies and provide texture without calories. Soak a hand towel or washcloth in water or low-sodium broth, wring it out, twist it into a tight roll, and freeze until solid. The cold soothes sore gums, and the frozen fabric resists shredding for 15 to 20 minutes. You’ve got to supervise while the chew thaws. As it softens, threads can loosen and become a choking or ingestion risk. Pick up the towel between chewing sessions to prevent your dog from treating it as a regular toy.
Non-edible chews make sense in specific situations:
When your dog destroys every edible chew in under five minutes and the cost adds up too fast.
During teething phases when cold, textured relief matters more than calories or nutrition.
For dogs who need to redirect chewing away from furniture or shoes but don’t have sensitive stomachs that require edible distractions.
When you want a washable, reusable option that can be cleaned and re-frozen or re-coated with peanut butter.
Safety matters more with fabric and rope. Threads can wrap around intestines if swallowed in long pieces. Always supervise, inspect for fraying, and retire any chew that starts shedding loose fibers. Non-edible options work well as part of a rotation but should never replace supervision or vet-check protocols.
Step-by-Step Hard Yak-Style Chew Recipe for Aggressive Chewers

Traditional Himalayan chhurpi is one of the hardest natural chews available. It’s made from yak or cow milk curds that are pressed, salted, and dried for weeks. This homemade version uses the same basic process but condenses the timeline to fit a home kitchen. The result is a rock-hard, protein-rich chew that can occupy a powerful chewer for hours. One gallon of skim milk yields around seven chews, with a total ingredient cost of about $7.67. Store-bought packs run $10.29 for three small pieces.
The recipe requires minimal ingredients: 1 gallon of skim milk, 1/2 cup lemon or lime juice, and 1 teaspoon salt. You’ll also need a large pot, a strainer, cheesecloth (or a clean, non-dyed cotton dish towel), two plates, a heavy pot or other weight for pressing, a baking sheet, and a cooling rack. Skim milk works best because the low fat content produces firmer curds. Whole milk will work but creates a softer, greasier final product.
Store-bought yak chews typically list skim milk, citrus juice, salt, and enzymes. This homemade version skips the enzymes and still produces a comparable texture. Cost per chew drops significantly when you make your own, and you control exactly what goes in.
Here’s the full process:
Heat the milk. Pour 1 gallon of skim milk into a large pot and place over medium-low heat. Stir continuously to prevent scorching. Heat until the milk reaches a gentle boil. You’ll see curds begin to separate from the whey within about 30 seconds once boiling starts.
Add acid and salt. As soon as the milk boils, add 1/2 cup lemon or lime juice and 1 teaspoon salt. Keep stirring. Curds will form quickly, usually within 30 seconds. The liquid will turn translucent and yellowish as the solids separate.
Strain the curds. Pour the entire pot through a strainer lined with cheesecloth or a clean cotton towel. This catches the curds and lets the whey drain away. Straining first reduces mess when you move the curds to the pressing step.
Press the curds. Gather the edges of the cheesecloth and twist to form a tight bundle. Place the bundle between two plates, then set a heavy pot or other weight on top. Press for 4 to 6 hours. More weight and longer pressing time remove more moisture, producing a harder final chew.
Slice and arrange. After pressing, unwrap the curds. You’ll have a firm, cheese-like block. Slice it into pieces sized appropriately for your dog. Larger pieces reduce choking risk. Arrange the pieces on a baking sheet fitted with a cooling rack to allow air circulation on all sides.
Bake at low heat. Preheat your oven to the lowest setting, ideally around 150°F. Bake the chew pieces for 40 minutes. This step begins the drying process and firms up the texture.
Air-dry for 24 to 36 hours. After baking, remove the chews and place them on a non-stick surface in a cool, dry spot. Let them sit undisturbed for 24 to 36 hours. During this time, the chews will continue to dry, darken slightly, and become very hard. The longer you let them dry, the tougher they get.
Store or serve. Once fully dried, the chews are ready. Store extras in an airtight container or freeze them to extend shelf life. Thaw frozen chews before offering them to reduce the risk of tooth damage or choking.
The entire process is time-consuming but not difficult. Most of the work is passive waiting. The result is a chew that can last for days or even weeks, depending on your dog’s chewing intensity and the thickness of the pieces you cut.
Safety Guidelines for Heavy Chewers Using Homemade Chews

Homemade chews carry risks if sized incorrectly, made from unsafe ingredients, or left unsupervised. Rawhide and similar animal-based chews can cause intestinal blockages, especially when dogs swallow large, softened chunks. Rope and fabric chews pose thread-ingestion risks. Long fibers can wrap around the intestines and require surgical removal. One reader-submitted safety anecdote from October 2024 described a dog vomiting blood and hard fragments after swallowing pieces of an old, chewed cow hoof. The fragments were roughly the size of a quarter, and the dog required veterinary intervention. That owner stopped giving hooves entirely after the incident.
Cloth-based frozen chews must be supervised while thawing. As the towel or washcloth softens, threads loosen and become chewable. Pick up the chew between sessions to prevent accidental ingestion. Rope toys coated in peanut butter offer enrichment but should be inspected regularly for fraying. Retire any toy that sheds fibers or shows signs of unraveling.
Sodium and xylitol are the two most common ingredient dangers. Too much salt stresses kidneys and can cause excessive thirst, vomiting, or worse. Keep salt to 1 teaspoon or less per gallon of milk in curd recipes, and always use low-sodium broth for frozen or gelatin chews. Xylitol, found in some peanut butters and sugar-free products, is toxic to dogs even in small amounts. Always check labels and choose xylitol-free options. Signs of digestive upset from chews include vomiting, diarrhea, lethargy, or refusal to eat. If you notice any of these, remove the chew immediately and contact your vet. Choking or blockage symptoms, such as drooling, gagging, or inability to defecate, require emergency veterinary care.
Storage, Shelf Life, and Mold Prevention for DIY Chews

Proper storage keeps homemade chews safe and extends their usable life. Airtight containers work well for short-term storage, up to one week for most dried chews. Glass jars with tight lids or heavy-duty zip-top bags keep moisture and contaminants out. For gelatin-based or higher-moisture recipes, refrigeration is necessary. Store pumpkin-gelatin chews in the fridge for up to five days, or freeze them for up to three months.
Freezing is the best method for long-term storage. Yak-style milk-curd chews, dehydrated sweet potato slices, and pumpkin bites all freeze well. Wrap individual chews in parchment paper, then place them in a freezer-safe bag or container. Label with the date. Frozen chews stay fresh for three to six months. Always thaw completely before serving to reduce the risk of tooth fractures or choking. Thaw in the refrigerator overnight, not at room temperature, to prevent bacterial growth.
Mold grows when chews retain too much moisture or are stored in warm, humid conditions. Fully dried chews rarely mold, but any recipe with residual moisture needs careful handling. If you see any green, white, or fuzzy spots, discard the chew immediately.
Storage method comparisons:
Airtight container at room temperature: best for fully dried chews. Use within one week.
Refrigerator in sealed container: necessary for gelatin or pumpkin recipes. Use within five days.
Freezer in zip-top bag or vacuum-sealed: extends shelf life to three to six months. Prevents mold and preserves texture.
Vacuum sealing: removes air and moisture. Ideal for long-term freezer storage and prevents freezer burn.
Open-air drying rack: use only during the initial drying phase (24 to 36 hours). Never for long-term storage.
Check stored chews regularly. Discard anything that smells off, feels slimy, or shows discoloration.
Portion Control, Chew Size, and Calorie Management

Chew size matters for both safety and nutrition. Pieces that are too small become choking hazards, especially for dogs who gulp rather than gnaw. A good rule: when in doubt, cut larger. For small dogs under 20 pounds, chews should be at least the size of a golf ball. For medium dogs (20 to 50 pounds), think tennis ball or larger. Large and giant breeds need chews the size of a softball or bigger to prevent accidental swallowing.
Homemade chews add calories, especially recipes that include peanut butter, gelatin, or starchy vegetables like sweet potato. A 1/4-inch sweet potato slice baked until dry contains roughly 15 to 20 calories. A yak-style milk-curd chew made from skim milk has about 30 to 40 calories per piece, depending on size. Peanut butter adds around 90 calories per tablespoon. If your dog gets multiple chews per day, those calories add up fast. Adjust meal portions to account for chew calories, or use chews as part of the daily food allowance rather than as extras. For dogs prone to weight gain, choose lower-calorie options like plain dehydrated carrot sticks or pumpkin-gelatin bites without added fat.
Supervision helps manage portion size in real time. Watch how your dog handles each chew. If small fragments break off and your dog swallows them whole, the chew is too brittle or too small. Switch to a larger, tougher option or a different recipe. Long-lasting yak chews vary in hardness depending on drying time. Softer batches crumble more and create mess. Harder batches resist breaking and reduce the risk of gulping chunks.
Training, Enrichment, and Behavior Benefits of Durable Homemade Chews

Chews support training by providing a high-value reward that lasts longer than a single treat. During crate training, a yak-style chew or a peanut butter coated rope keeps a puppy occupied while building positive associations with the crate. For dogs learning to settle on a mat or during grooming appointments, a long-lasting chew gives them something to focus on instead of the discomfort or boredom. The key is pairing the chew with the behavior you want to reinforce. Hand the chew at the moment your dog enters the crate, steps onto the mat, or sits calmly for a nail trim.
Enrichment benefits go beyond distraction. Chewing releases endorphins and reduces stress. A homemade frozen broth towel soothes teething pain while giving a puppy a job. A tough sweet potato chip satisfies the instinct to gnaw and keeps destructive chewing away from furniture. Rotation prevents boredom. Offer different textures and flavors throughout the week: a gelatin-pumpkin bite on Monday, a yak chew on Wednesday, a braided towel on Friday. Dogs stay engaged longer when the experience varies.
Stuffing durable chews adds another layer of challenge. Hollow yak chews can be filled with a small amount of xylitol-free peanut butter or plain Greek yogurt. Freeze the stuffed chew for an hour before serving to slow down consumption. Scent infusion works with fabric and rope chews. Rub a small amount of low-sodium broth or peanut butter into the fibers, let it dry slightly, and offer. The smell holds your dog’s attention even after the flavor fades.
Simple enrichment add-ons to try:
Freeze a dehydrated sweet potato slice inside a Kong filled with mashed pumpkin.
Tie a peanut butter coated rope to a sturdy post at nose height for a stationary tug option.
Rotate chew textures daily to keep interest high and prevent one type from becoming boring.
Chews work best as part of a routine. Offer them at predictable times: after a walk, during alone time, or as a wind-down before bed. Consistency builds calm and gives your dog something to look forward to without overfeeding or creating dependency.
Final Words
You’ve got three DIY chew categories—vegetable, protein, and milk-based—plus one full step-by-step recipe and a short yak-style preview.
The post also walks through safe picks like sweet potato and pumpkin, oven and dehydrator tips to boost toughness, and storage and portioning pointers so treats stay fresh.
Pick a homemade long-lasting chews for aggressive chewers recipe to try this weekend; start with sweet potato hard-bake chips, supervise that first session, and enjoy the calm, satisfied chew time.
FAQ
Q: How do you make homemade dog chews long-lasting?
A: Making homemade dog chews long-lasting means reducing moisture and increasing thickness: slow-bake thick sweet potato chips, dehydrate gelatin or pumpkin molds until firm, or dry yak-style for a very tough chew.
Q: What are the long-lasting chews for heavy chewers? / What is a good chew for dogs that last a long time?
A: Long-lasting chews for heavy chewers include thick baked sweet potato chips, pressed yak-style milk chews, dense beef jerky, or single-ingredient frozen carrots; non-edible braided denim or rope can help, but always supervise.
Q: What is the 90 10 rule for dogs?
A: The 90/10 rule for dogs means feed about 90% of daily calories from complete dog food and keep treats, table scraps, and extras to roughly 10% or less.